This is my mom's method of making farmers cheese. Grandma made this cheese in Ukraine. Steps are easy and the results are wonderful!

This post may contain affiliate links. Read my disclosure policy.

This is my mom’s method of making farmer’s cheese. Grandma made this cheese in Ukraine. It takes a few days, but the steps are easy and the results are wonderful. Not to mention you will feel like a ninja after you’ve made your own cheese.

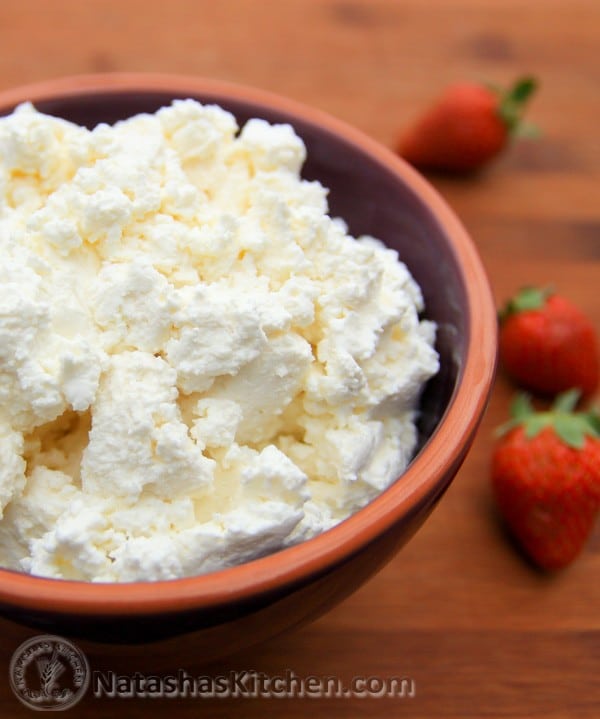
You end up with a good amount of farmers cheese and whey. Use organic milk for the best tasting cheese (I buy discounted organic milk that is about to expire just for this!). You can use the cheese to make syrniki  or cheese crepes (nalesniki). Keep the whey (yellowish juice) to make bread.

Substitute water for whey and your bread will always taste better and it will be healthier since whey contains protein that is easy to digest. Are you a cheese ninja? How do you make your farmer’s cheese?

Ingredients for Farmers Cheese:

1 gallon whole milk (get the best quality you can; organic is best), At room temperature.
1/2 gallon Cultured low fat buttermilk, at room temp

What you will need:

4 layers of cheese cloth

Time to make:

3 days

Day 1:

1. Allow the milk gallon and buttermilk to come to room temperature on the counter (about 7 hours).

A gallon of milk and a half-gallon of low-fat buttermilk

2. Pour milk and buttermilk into a large soup pot. Cover and place in a warm (100 ˚ F) oven for 1 hour or until mixture feels luke warm.

Milk being poured into a large pot

Buttermilk being poured into a large pot with milk in it

3. Remove from oven and place in a warm room (I put mine on the floor next to the heating vent in the laundry room)  and let it sit for 24 hours. When it’s done, it should become the consistency of sweetened condensed milk. It pulls when you lift it up with a spoon and should not really stick to your spoon if you insert it vertically and remove it straight out. Do not stir.

Farmers cheese, tvorog, mixture in a large pot

Someone mixing farmers cheese, tvorog, mixture in a pot with a spoon

Day 2:

4. Place on the stove again over LOW HEAT, UNCOVERED for 40 minutes or until it is WARM. Do Not Stir. You have to heat it up slowly, since high temperatures destroy the nutritious protein.

Farmers cheese, tvorog, in a large pot on the stove top

5. Remove from stove and place in a warm room for another 24 hours (again, next to the heating vent on the floor).

Day 3:

6. Place on the stove over medium/low heat UNCOVERED for 40 minutes or until hot (do not boil). The cheese will separate from the whey. Turn off the heat and let it sit covered for an hour (this helps for the curds to separate as well).

Cooked farmers cheese, tvorog, in a pot

7. Place 4 layers of cheesecloth over a large colander set inside a large bowl.

A cheesecloth

8. Pour cheese mixture over the cheesecloth.

Farmers cheese, tvorog, being strained through a cheesecloth Natasha squeezing the liquid from the cheesecloth that is full of farmers cheese, tvorog

Here’s the Leftover whey. Refrigerate this stuff and use it for bread. There will be some settling on the bottom

The liquid that was squeezed out of the farmers cheese in a bowl

9. You can tie a knot with your cheesecloth and hang it over your kitchen faucet for 8-10 hours OR place a cutting board either in a baking dish or in the sink. Put bag of cheese on top. Cover with another cutting board and place a heavy weight over the top (i.e. dutch oven filled with water or a large jug of water).

Farmers cheese, tvorog, wrapped in the cheese cloth being weighed down with a cutting board and pot

10. Remove cheese after 10 hours and make something tasty or refrigerate. You can let it sit longer if you want a drier cheese.

Farmers cheese, tvorog, wrapped in cheese cloth

A ball of farmers cheese, tvorog, on a cutting board

This is my mom's method of making farmers cheese. Grandma made this cheese in Ukraine. Steps are easy and the results are wonderful!

So, how do you make your cheese?

Natasha's Kitchen Cookbook

Farmer's Cheese Tvorog Recipe

4.91 from 44 votes
Author: Natasha of NatashasKitchen.com
This is my mom's method of making farmers cheese. Grandma made this cheese in Ukraine. Steps are easy and the results are wonderful!
Buy organic milk that is nearly expired and deeply discounted. I've found that organic milk tastes best.
Prep Time: 2 days 8 hours
Cook Time: 2 hours 2 minutes
Total Time: 2 days 10 hours 2 minutes

Ingredients 

Servings: 2 1/2 to 3 lbs of cheese and about 3 Liters of whey
  • 1 gal whole milk at room temperature, organic is best
  • 1/2 gallon Cultured lowfat buttermilk

What you will need:

  • 4 layers of cheese cloth

Instructions

Time to make: 3 days

    Day 1:

    • Allow the milk gallon and buttermilk to come to room temperature on the counter (about 7 hours).
    • Pour milk and buttermilk into a large soup pot. Cover and place in a warm (100˚ F) oven for 1 hour or until mixture feels luke warm.
    • Remove from oven and place in a warm room and let it sit for 24 hours. When it's done, it should become the consistency of sweetened condensed milk. It pulls when you lift it up with a spoon and should not really stick to your spoon if you insert it vertically and remove it straight out. Do not stir.

    Day 2:

    • Place on the stove again over low heat, uncovered for 40 minutes or until it is warm. Do Not Stir. You have to heat it up slowly, since high temperatures destroy the nutritious protein.
    • Remove from stove and place in a warm room for another 24 hours (again, next to the heating vent on the floor).

    Day 3:

    • Place on the stove over medium/low heat for 40 minutes or until hot (do not boil). The cheese will separate from the whey. Turn off the heat and let it sit covered for an hour (this helps for the curds to separate as well).
    • Place 4 layers of cheesecloth over a large colander inside a large bowl.
    • Pour cheese mixture over the cheesecloth. Tie the top of the cheesecloth and hang it over your kitchen faucet for 8-10 hours OR place a cutting board either in a baking dish or in the sink. Put bag of cheese on top. Cover with another cutting board and place a heavy weight over the top.
    • Remove cheese after 12 hours and make something tasty or refrigerate. You can let it sit longer if you want a drier cheese.
    Course: Dessert
    Cuisine: American, Russian, Ukrainian
    Keyword: Farmer's Cheese, Tvorog
    Skill Level: Medium
    Cost to Make: $

    Final Final Picmonkey Hashtag banner

    Natasha Kravchuk

    Welcome to my kitchen! I am Natasha, the blogger behind Natasha's Kitchen (since 2009). My husband and I run this blog together and share only our best, family approved and tested recipes with YOU. Thanks for stopping by! We are so happy you're here.

    Read more posts by Natasha

    Leave a Comment

    Recipe Rating


    Comments

    • Miranda
      December 20, 2023

      I am on Day 3, and my “cheese” doesn’t even look like your day #2 picture 🙁 … Its firming up though and starting to split on the top. I put a chopstick in and I wiggled it around. It also smells kind of like cream cheese, is that normal? Sorry for the questions, I guess Im just worried that Ive somehow ruined it and/or will cause people to get sick…

      Reply

      • Natasha
        December 22, 2023

        HI Miranda, you might need to increase the heat until you see the cheese separate from the whey.

        Reply

    • Audrey D Busch
      October 24, 2023

      Two questions: When do you add salt? if you want to, and #2. My oven shows an error message when I try to set it to 100, minimum is 170

      Reply

      • Natasha's Kitchen
        October 25, 2023

        We’ve never added salt because it isn’t really necessary. You can add the salt when it is all still liquid. I’m not so sure about your oven, different models have different settings.

        Reply

    • Debra Nelson
      June 23, 2023

      Natasha, My grandparents came from Slovakia, in the early 1910’s. My Baba made her own cheese for cheese strudel and cheese pie. This is as close to Baba’s cheese as I have ever made!! Thanks for the memories!!

      Reply

      • NatashasKitchen.com
        June 24, 2023

        That’s great, Debra! I’m so glad you found this recipe!

        Reply

    • Victoria F
      August 28, 2022

      My whey has already separated on day one before I even put it on the stove (it looks similar to your day two picture). Did I do something wrong?

      Reply

      • Natasha
        August 30, 2022

        Hi Victoria, it may have gotten too hot but it will still work to proceed.

        Reply

    • Nicole
      June 21, 2022

      Have you tried making this with raw milk? Since about 1/3 of the gallon is cream do I still need the same amount of buttermilk?

      Reply

      • Natashas Kitchen
        June 21, 2022

        Hi Nicole, I haven’t tested that myself, but my readers have mentioned they have made it with raw milk, I wish I could better advise. If you experiment, let me know how you liked the recipe.

        Reply

      • Lauren
        March 1, 2023

        I have! I think using raw milk is the closest to the tradition version you can get. In that case, you really don’t need buttermilk. When I have combined buttermilk and raw milk in a 100 degree proofing oven, it’s been solid within the first 24 hours. I prefer just the raw milk on its own myself.

        Reply

        • Vik
          June 9, 2023

          Hi! Did you hear it at all? I tried raw milk and letting it stand, heat, stand, heat but the taste was bitter.
          So I bought cultured cream and the best organic milk that is very low pasteurized and it did not work. It separated but did not harden enough. It just all/most fell through the cheese cloth.

          Reply

    • Marilyn Smith
      March 5, 2022

      Thanks, Natasha! I have not tried this yet but will soon. I have decided to try to make Ukrainian food to honour the people who are working so hard to save their country. I am intending to use the cheese in pirohi. Thanks so very much!

      Reply

      • NatashasKitchen.com
        March 5, 2022

        You’re very welcome! I hope you love it.

        Reply

      • Pam Tulchinsky
        July 11, 2022

        Me too! This is my second time making it and it is delicious. Very authentic.

        Reply

        • Natashas Kitchen
          July 11, 2022

          I’m so glad you loved it, Pam!

          Reply

    • Lena
      October 21, 2021

      Do you recipe for what to use the whey for / how.
      Thank you

      Reply

      • Natasha
        October 21, 2021

        Hi Lena, I don’t have any specific recipes with whey but when I have it, I love to use it for bread baking and use it instead of water for bread.

        Reply

        • Audrey D Busch
          October 22, 2023

          I love adding the whey to my potato soup. Guests love the mystery ingredient.

          Reply

      • Митя
        February 10, 2022

        you can also use the whey instead of water in your soup stock for a huge flavor boost. if you boil down the whey to concentrate it a bit first, it’ll be the best soup you’ve made in your life.

        i found this recipe while trying to remember how my aunt learned to make tvorog from her grandmother, and this is pretty much what i remember. many thanks, Natasha! Молодец!

        Reply

    • Kristyna
      June 1, 2021

      Natasha, how long will the cheese last?
      I am so excited to try it! Tvaroh is the only food I miss from Europe.. but 3lbs of cheese will take me some time to eat and I don’t wanna waste it. Thank You… I love all the recipes I tried from you.

      Reply

      • Natashas Kitchen
        June 1, 2021

        Hi Kristyn, I haven’t tested it’s limits just because we always consume it within 3-5 days. I would say at least a week and longer if you keep it in an airtight container with as little air as possible (since, as with all cheeses, air will cause it to spoil faster). One of our readers mentioned it freezes well.

        Reply

    • Ali
      May 14, 2021

      Hi Natasha, I just realized I put 1 quart buttermilk instead of 2. I already warmed up the mixture in the oven. Could I add some plain yogurt at room temperature on the second day before heating up? Or will that ruin it? If yes, about how much should I add? Let me know asap….Thankyou

      Reply

      • Natasha
        May 14, 2021

        HI Ali I haven’t tested that. It may work, but I would probably leave it as is and make a smaller batch.

        Reply

        • Ali
          May 15, 2021

          Thanks, I will try that!

          Reply

        • AB
          June 8, 2022

          The cheese tastes good by the recipe with buttermilk. This time I tried making it with kefir (lifeway) and it did not turn out, it became sour but would not clump… I wonder if anyone else experienced this? I thought I would let others know so that they don’t waste milk… stick with buttermilk 🙂

          Reply

          • NatashasKitchen.com
            June 9, 2022

            Thank you for sharing that with us! I’m sure my other readers will find this helpful, they are often looking for substitutions. 🙂

            Reply

            • Laura
              August 7, 2023

              Super lengthy recipe.
              I like that it’s not vinegar but all this could be achieved just by leaving milk out on countertop with yogurt or buttermilk until it becomes consistancy of buttermilk, then heat on low until it separates, cool and put through cheesecloth. I keep it in a glass container with lid and it keeps for several weeks or freeze. Btw, I use one spoon of yogurt for 1 gallon of milk.

          • Lana
            August 16, 2022

            I had the same very sour cheese when I used Lifeway kefir 1% or 3%, lesson learned.

            Reply

    • Natalya
      April 26, 2021

      Love this recipe! And it will be the base for my sirnaya pasha. 🙂

      I didn’t have enough buttermilk so I added plain kefir. Came out amazing and I didn’t need to do the last boil. I was afraid it would get rubbery. Important to note, the whey makes an amazing ricotta. Check out the link I added below. Only difference is I used lemon vs vinegar for the acidity. So yummy on baguette with a drizzle of olive oil black pepper and salt.

      https://www.fermentingforfoodies.com/whey-ricotta/

      Reply

    • Lioudmila
      April 24, 2021

      Hi, just wonder why you should not stir the milk? Thank you

      Reply

      • Natasha
        April 24, 2021

        Hi, you want the whey to separate from the cheese and stirring would blend it together and slow down the separating process.

        Reply

    • Tania
      April 11, 2021

      wonder if DASH yogurt maker could make the TVOROG
      Tania

      Reply

    • Anastasiya
      February 13, 2021

      Love it!
      Enjoyed it just like in my childhood with a bit of sour cream and honey 😋

      Reply

      • Natashas Kitchen
        February 13, 2021

        The best, isn’t it? I’m glad you enjoyed this recipe.

        Reply

    • rosemary merrill
      January 23, 2021

      My oven’s lowest setting is 170 degrees…what to do about Day 1 Step 2…….does everyone else have an oven that operates at 100 degrees

      Reply

      • Natasha
        January 23, 2021

        Hi Rosemary, I would prop open the oven open with a wooden spoon so it doesn’t get too hot.

        Reply

      • Paula
        March 12, 2022

        I make yogurt in the oven by ‘preheating’ with the oven light then leaving the light on throughout the incubation. If I forget to ‘preheat’ I put a container of hot water on the same rack as the yogurt. Works well for me

        Reply

    • Julia
      January 19, 2021

      Since organic milk is twice the cost of regular milk, do you think that using organic milk is worth the difference compared to using regular milk when making this tvorog?

      Reply

      • Natasha
        January 21, 2021

        Hi Julia, I have used both (note the non-organic milk in my photos). Sometimes I wait for the organic milk to go on sale and make tvorog then. Sometimes it’s clearance and near expiration and I grab those for making cheese.

        Reply

    As Featured On

    Never Go "Hangry" Again!

    Get weekly updates on new recipes, exclusive giveaways plus behind the scenes photos.