
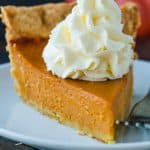
Thanksgiving wouldn’t be the same without a classic Pumpkin Pie Recipe for dessert, topped with homemade whipped cream. Watch my step-by-step video tutorial and learn how to make pumpkin pie with a buttery, flaky homemade crust and perfectly spiced creamy pumpkin filling.

This post may contain affiliate links. Read my disclosure policy.
Helpful Reader Review
“Best pumpkin pie I’ve ever tasted. Thank you – been making it for months now. My family and friends love when I make it.” – Mayraliz ★★★★★
Pumpkin Pie Video
We love pumpkin recipes, from our decadent Pumpkin Cheesecake to Pumpkin Bread. If you are a fan of pumpkin flavors, this homemade Pumpkin Pie is a must-try. Watch my video tutorial and see how easy it is to make this holiday table staple.
Just like with Apple Pie, my husband and I honestly love making pumpkin pie throughout Autumn and winter. It’s so comforting and cozy and will make your kitchen smell incredible.
The Best Pumpkin Pie Recipe
Move over, pre-made Costco Pumpkin Pie! There’s really no store-bought pie that even comes close to this homemade pumpkin pie, not even Costco’s. It’s worth the effort to make one from scratch (especially for Thanksgiving), and this one is epic. We’ve even turned this recipe into Mini Pumpkin Pies.
It starts with the best, tender, flaky pie crust, and trust me when I tell you that pre-baking will make all the difference in preventing a soggy crust—I’ve tested it both ways, and there’s no going back. It has a beautiful, warm pumpkin flavor, and the homemade whipped cream has a special ingredient that makes the flavor pop. You’ll savor every bite of this homemade pumpkin pie.

Pumpkin Pie Ingredients
After testing dozens of pumpkin pie recipes, this one has the perfect texture and flavor. The key to getting the right custard-like consistency is in the extra egg yolks. Keep those whites for your next egg white omelet.
- Pie Crust – use 1 pie disk or half of our pie crust recipe. You can even bake your crusts ahead (see below). If the only thing stopping you from making a pumpkin pie is the crust, then use a store-bought deep-dish pie crust.
- Pumpkin puree – this can make or break your pie, so use Libby’s (see why below).
- 3 Egg yolks, plus 1 whole egg – the extra yolks give this a creamy custard consistency. Keep one of those egg whites to brush the crust.
- Sugar – the combination of light brown and granulated sugar adds just the right amount of sweetness
- Spices – salt, pumpkin pie spice, and cinnamon are all you need. These along with vanilla extract, make the pumpkin flavors really shine.
- Evaporated milk – gives the pie a creamy, silky consistency.

Why Libby’s is the Best for Pumpkin Pie!
I highly recommend Libby’s brand 100% pure pumpkin. There is a good reason everyone recommends Libby’s: I’ve done several comparison tests and Libby’s brand wins for the best texture, color, and pumpkin flavor.
In many recipes like Pumpkin Cake, Pumpkin Cupcakes, and Pumpkin Pancakes, I love using homemade pumpkin puree, but for pumpkin pie, Libby’s will give you the most consistent results.

Should I pre-bake the crust for Pumpkin Pie?
Pre-baking or ‘blind baking’ the pie crust is important for pumpkin pie because it ensures that it stays crisp and doesn’t get soggy as the filling bakes. I have tested with and without pre-baking and the crust was significantly better (flakier and crisper) when pre-baked.
The process is well worth it and you will love the crust just as much as you love the filling. Get all of our best tips for blind-baking a crust in our Pie Crust Recipe.

What Can I Use as Pie Weights?
I use either ceramic pie weights or 1 1/2 to 2 lbs of dried beans. You can also use white rice to pre-bake the pie crust. Ceramic pie weights are an investment initially, but can last for years and be reused countless times. If you use beans or rice, you can let them cool to room temperature and reuse them.
How to Make Pumpkin Pie
Making a pumpkin pie is easier and takes less time than you think. The best part is, you can pre-bake the crust or even pre-bake your entire pie.
- Prepare the crust – roll chilled pie dough to a 12″ circle, transfer to a pie pan, crimp the edges, and freeze 30 minutes.
- Blind-bake crust – line the frozen pie crust with a circle of crinkled parchment paper and fill 3/4 full with pie weights. Bake at 425˚F for 17 minutes, remove pie weights, prick all over with a fork, brush with egg white and bake another 5 minutes.
- Make the Filling – Whisk together all filling ingredients then add evaporated milk and whisk until smooth. Bake at 350˚F for 60 minutes, then cool pie to room temperature.
- Whipped Cream – beat 1 cup heavy cream until soft peaks form then add sugar, and vanilla and beat until medium/stiff peaks form. Pipe over cooled slices of pie.

Natasha’s Serving Tip:
As with Cheesecake, use a damp paper towel to wipe the knife between cuts for clean slices. If you really want to make it special, drizzle with homemade caramel sauce.

How to prevent cracks in Pumpkin Pie
- Do not overbake – This is the #1 reason why a pumpkin pie cracks. An overbaked center is more likely to get dry and crack. Also, baking at a lower temperature (350˚F) prevents the cake from rising too quickly, then sinking and cracking.
- Avoid whisking the filling vigorously. Continue whisking after the evaporated milk is added until the bubbles are broken down.
- Avoid the knife test for doneness – inserting a knife in the center can cause a big crack. Instead, test for doneness by giving the pan a little jolt. It should be completely set at the edges with a slight wobble in the center. It will continue to set as it cools.

Make-Ahead and Storage Tips
- Pre-Bake the Crust – once baked, cool to room temperature, then wrap it in plastic wrap and refrigerate for up to 2 days or freeze up to 1 month. Thaw in the refrigerator overnight before using.
- To Make Pumpkin Pie in Advance – Cool completely to room temperature for at least 2 to 3 hours then cover loosely with plastic wrap or aluminum foil and refrigerate for up to 3 days.
- To Freeze Pumpkin Pie – Once the pie is at room temperature, you can wrap in several layers of plastic wrap or foil and freeze for up to 1 month. Thaw in the refrigerator for 12 hours before serving.
Pumpkin Pie Recipe
Ingredients
For the Pumpkin Pie:
- 1 pie crust, (1 disk or half of our pie crust recipe)
- 1 egg white , (to brush inside hot crust)
- 15 oz libby's pumpkin puree, room temperature (Libby’s brand works best)
- 1 large egg, plus 3 egg yolks, room temp
- 1/2 cup light brown sugar, packed (break up any clumps before adding)
- 1/4 cup granulated sugar
- 1 tsp pumpkin pie spice
- 1/2 tsp cinnamon
- 1/2 tsp salt
- 1 tsp vanilla extract
- 12 oz evaporated milk, room temperature
Whipped Cream
- 1 cup heavy whipping cream
- 3 Tbsp granulated sugar
- 1/2 tsp vanilla extract
Instructions
Prepare the Pie Crust:
- Roll 1 chilled pie disk to a 12” diameter circle. Transfer to a deep 9” glass pie pan. Fold the excess dough behind the crust under at the edge to build up the edge for crimping then crimp the edge. Cover with plastic wrap and freeze for 30 minutes or refrigerate 1 hour, which will help the crust bake more evenly without sliding down.
Blind Baking the Crust:
- Preheat oven to 425˚F. Line the center of your chilled pie crust with a 9-10″ ring of crinkled up parchment paper and fill about 3/4 full with dry beans or pie weights. Bake 17 minutes or until edges are starting to turn golden.
- Remove pie weights, prick the bottom of the crust all over with a fork, brush the inside of the pie crust with egg white and place back in the oven without weights for 5 minutes or until the center looks dry. The egg white creates a barrier so the filling doesn’t soak into the crust. Cool completely to room temp before adding the filling.
Make Pumpkin Pie Filling and Bake:
- In a large mixing bowl, whisk together pumpkin puree, egg and yolks, brown and granulated sugar, vanilla extract, salt, pumpkin spice, and cinnamon until well combined.
- Add evaporated milk and whisk until blended and all of the bubbles are gone from the batter. Tap bowl against the counter a few times to knock out any extra bubbles. Pour into pre-baked and cooled crust.
- Reduce oven temperature to 350˚F and bake 55-60 minutes until the pie is nearly set. It should be completely set at the edges with just a slightly loose center. It should be barely wobbly like a cheesecake. Cool completely on a wire rack until room temp (3 hours) then serve or refrigerate if not serving the same day.
Make the Whipped Cream:
- In a mixing bowl with the whisk attachment, beat on medium speed with the whisk attachment or egg beaters for 1 minute until soft peaks form.
- Add 3 Tbsp sugar and 1/2vanilla and beat on medium-high speed until medium peaks form.
Nutrition Per Serving
Filed Under

More Classic Thanksgiving Recipes
If you love a traditional Thanksgiving menu, these are our top recipes for your holiday feast.
- Juicy Roast Turkey
- Turkey Gravy
- Soft Dinner Rolls
- Cranberry Sauce
- Creamy Mashed Potatoes
- Sweet Potato Casserole
- Au Gratin Potatoes
- Cornbread
- Baked Mac and Cheese


I love this recipe! I use it every year, but this year the whipped cream recipe has changed. It used to have rum in it. Can you remind me how much goes in? Thank you. ☺️
Hi Becca! For our Pumpkin Cheesecake recipe, we use 1 tsp of rum for 1 cup cream.
Hi NatashasKitchen, I just made this pie. I baked it at 350F for 55mins, and when I took out of the oven the pie filling looked uncooked (liquids look). Then I baked it again for 350F for another 55mins. And it still kinda liquidy look. Any ideas what cause it?
Hi there! The filling continues to firm up as it cools at room temperature and then in the fridge. Let it cool completely (a few hours).
Such fantastic recipes! Since discovery Natasha’s Kitchen it has become my first choice for recipes. So far every single recipe I have followed has been a success! Thank you!
That’s so nice to hear, Amanda! Thank you so much for sharing that with me.
Is it safe to put a frozen pie plate with the frozen pie crust into the hot 425° oven?
Hi Tina, if your pie dish is oven safe, it should be okay. Typically metal and aluminim work best from freeer to over. Ceramix or glass can be sensiteve to sudden temperature changes however.
what can I use in place of pumpkin pie spice?
Hi Dawn, Pumpkin pie spice is made with a mixture of cinnamon, nutmeg, ginger, all spice. You can use a combination of some or all of these to get the flavor. Use 1 teaspoon in total.
Can I use fat free evaporated milk? It’s all I have on hand .❤
If should be fine, maybe add 1–2 tablespoons of melted butter per cup of fat-free evaporated milk to mimic some richness.