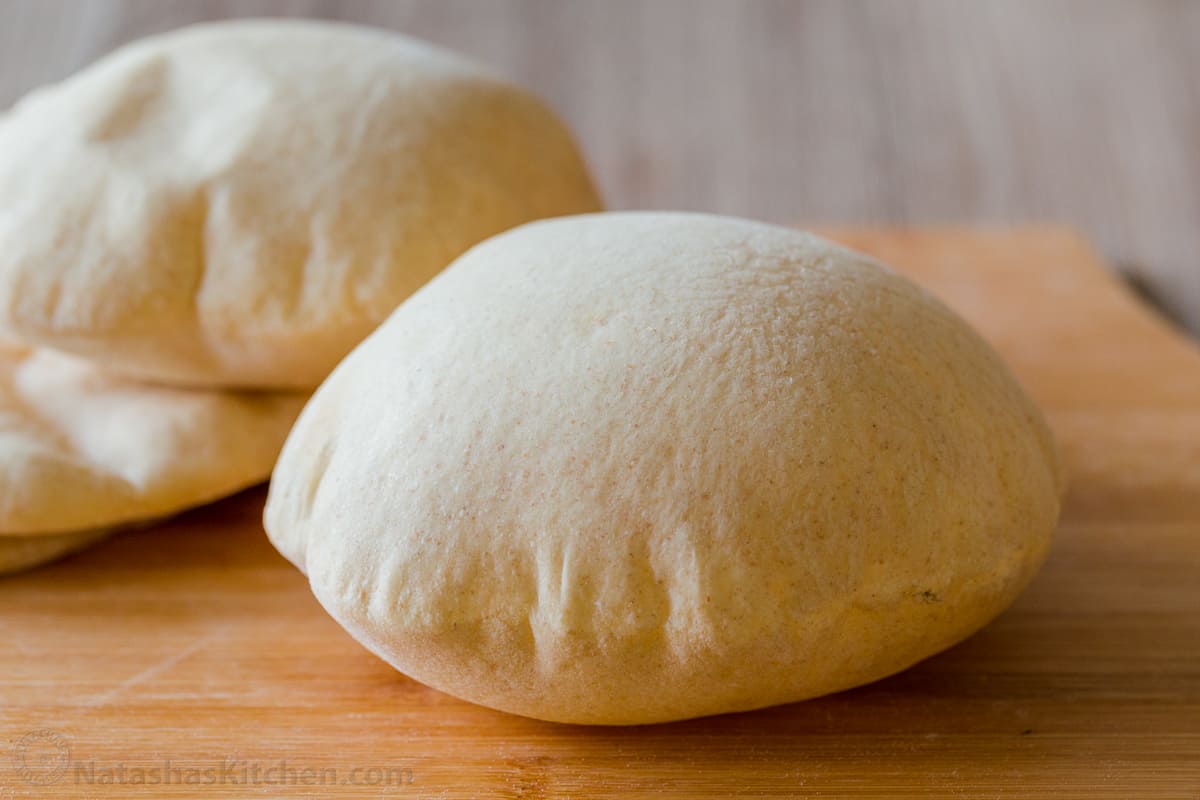
This homemade Pita Bread Recipe puffs up beautifully to form that perfect pocket inside. It has a soft, flavorful crumb, and even beginners rave about how easy it is! Watch the video tutorial and learn how to make Pita Bread in the oven or on the stovetop.

This post may contain affiliate links. Read my disclosure policy.
Helpful Reader Review
“The addition of the wheat flour gave them more flavor. After several attempts with other recipes, these turned out perfect. Thank you!“ – Robin ★★★★★
Homemade Pita Bread Video
Making yeasted pita bread at home is simply so much fun! I love to watch them puff on the stove or in the oven to create a pocket, and the payoff is huge!
What is the difference between pita bread and naan or flatbread?
Pita is a quick-cooking, yeast-leavened flatbread that puffs up when it’s cooked to form a pocket in the center. Pita bread is a lighter bread that is leavened with yeast, while flatbread is not. Naan usually has an egg and yogurt base.

Ingredients for Pita Bread
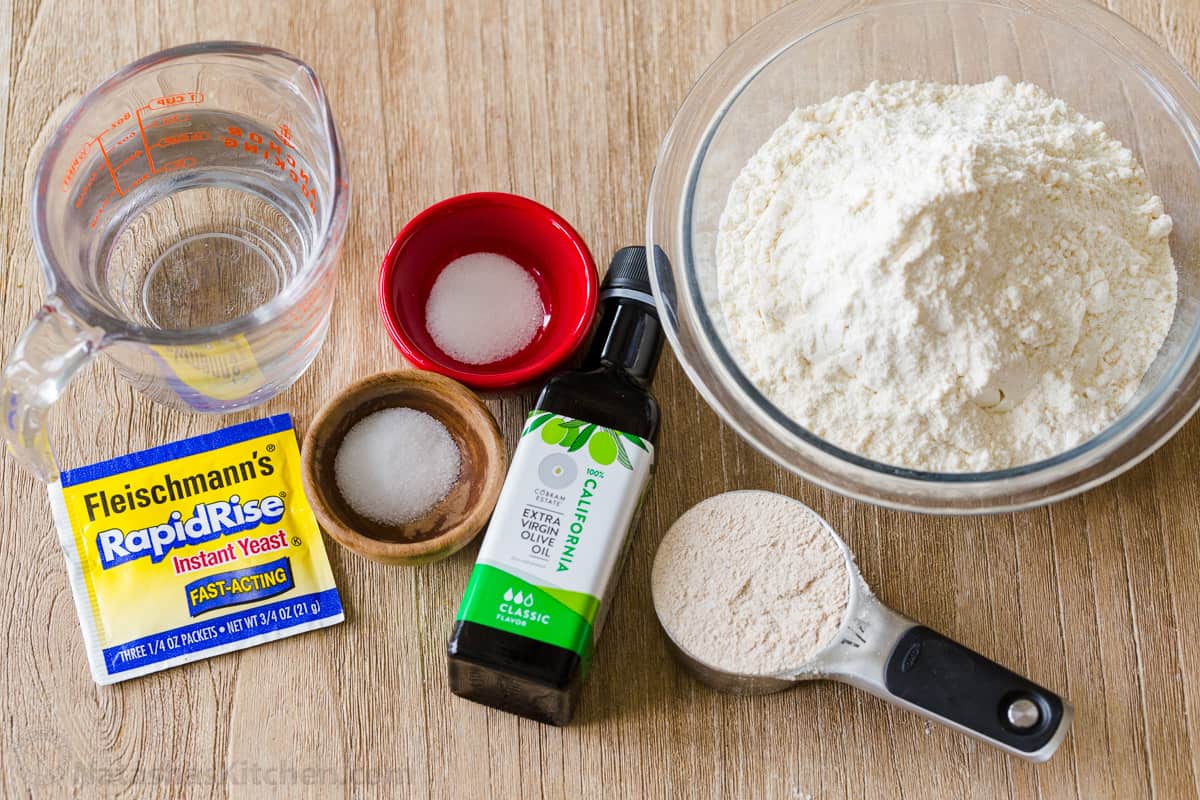
My homemade pita dough is made with these basic pantry staples.
- Warm water – should be 110˚F to 115˚F on a thermometer
- Instant yeast – 1 packet or 2 1/4 tsp of instant or rapid rise yeast – check the expiration date!
- Sugar – to help jumpstart the proofing process
- Flour – we love a combination of mostly all-purpose flour to keep the pita very soft, with a little whole wheat flour to add flavor and color. You can swap the whole wheat with all-purpose flour, if needed.
- Extra Virgin Olive Oil – use extra virgin for the best flavor
- Salt – we use fine sea salt. As with any bread, salt is critical for a great taste!

How to Make Pita Dough
Check out my video tips as you go so you can see exactly how pita bread should look at each step.
- Proof Yeast – Use a large mixing bowl to combine warm water, sugar, yeast, and whole wheat flour with a whisk, and then rest for 15 minutes.
- Add the rest of the ingredients until a shaggy dough forms.
- Knead – Knead for 5 minutes. Add flour if it seems too sticky, since it should be soft and tacky to the touch.
- Proof Dough – Grease a clean mixing bowl and dough with 1 tsp olive oil, and then cover the bowl and place it in a warm (100˚F) place for 45 minutes, or at room temperature for 90 minutes, until doubled in volume.
- If baking in the oven – Once the dough has doubled, preheat oven to 500˚F with a baking stone or inverted baking sheet on the bottom rack position.

How to Form Pita Bread
- Divide dough – Punch the dough down, and then cut into 8 even pieces. Roll the first piece of dough until the dimple underneath is smoothed out. Cover with a damp kitchen towel for 15 minutes.
- Roll dough – Flour the work surface, then press a doughball flat with your fingertips. Use a rolling pin to roll dough balls to 7″ disks, and then cover with a damp towel in one layer for 10 minutes.

Pro Tip:
To keep the dough from drying out, cover it with a damp kitchen towel after rolling. Also, cover the pita bread with a dry kitchen towel 5 minutes after it is cooked, or it will get dry.
How to Bake Pita Bread
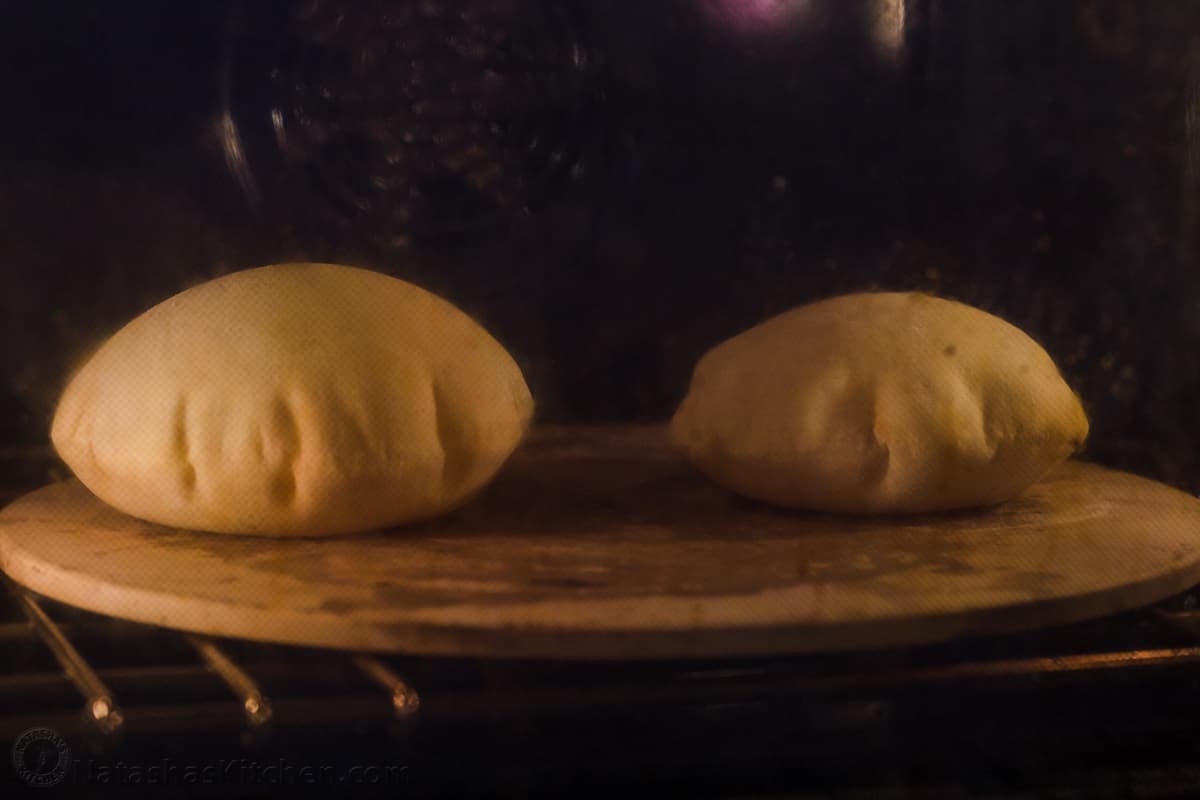
- Bake on the fully preheated pizza stone at 500˚F for 2 to 2 1/2 minutes. Once puffed, transfer to a rack for 5 minutes, and then cover with a dry towel.

Make Stovetop Pita Bread
- Preheat a cast-iron skillet over medium/high heat. Add olive oil and then cook rounds for 30 seconds. When it begins to bubble, flip the dough and cook 1 minute until it puffs.

Why did my pita bread not puff up?
After many batches (and a freezer packed with homemade pita bread), we identified all of the tips and tricks to get that mesmerizing puff and perfectly formed pocket in the center.
- Fresh Ingredients – Make sure your ingredients are fresh, and yeast or flour is not expired.
- Preheat baking stone or cast-iron pan – Preheat the pizza stone and oven for at least 20 minutes, or preheat the pan until a drop of water immediately evaporates. The super-hot surface traps steam to puff up the center of the pita.
- Generously flour the counter before rolling the dough. If the dough sticks to the counter while rolling, the pita may tear, causing steam to escape so it won’t puff properly.
- Prep the dough – Roll the dough until you no longer see a dimple at the bottom (which can prevent the pita from puffing properly, or cause a tear/deflating). Also, press the dough before rolling to distribute the air bubbles.

How to Serve Pita Bread
Here are some of our favorite ways to enjoy homemade pita bread:
- Gyros – fill with gyro meat, lettuce, tomato, feta cheese, and Tzatziki Sauce.
- Fajita Pitas – put Shrimp Fajitas, Chicken Fajitas (or Sheet Pan Chicken Fajitas) over pita bread and serve.
- With Dip – slice up the pita bread into wedges, drizzle with extra virgin olive oil, and serve with Tzatziki, Hummus, or Spinach and Artichoke Dip.
- Stuffed Pitas – Cut pita bread in half, open the pita pocket, and fill with Chicken Salad or Tuna Salad.
- Toasted Chips – Follow our tutorial on How to Make Pita Chips alongside – Greek Chicken Bowls, Maroulosalata Greek Salad

Make-Ahead and Storage
We store cooled, fresh pitas on the counter in a zip-top container for up to 3 days, and then store homemade pita bread in our freezer!
- Freezing: once cooled, store in a freezer-safe zip-top bag with all the air removed in the freezer for up to 3 months. Don’t pack them tightly stacked because they will be difficult to separate later.
- To Reheat: Warm pitas in an oven, air fryer, or microwave until thawed and just warm.

There’s no match for soft and fresh homemade pita bread. This recipe makes for the best pita pockets every single time! Bake in the oven or on the stovetop for, and let me know how you love to enjoy pita.
Homemade Pita Bread Recipe

Ingredients
- 1 cup warm water
- 2 1/4 tsp instant yeast, 1 packet
- 1/2 tsp sugar
- 1/4 cup whole wheat flour
- 2 Tbsp extra virgin olive oil, plus another 1 tsp to oil the bowl
- 2 1/2 cups all-purpose flour, plus more to dust, measured correctly
- 1 1/2 tsp fine sea salt
Instructions
How to Make Pita Dough:
- Proof yeast – In a large mixing bowl, combine warm water, sugar, yeast, and 1/4 cup whole wheat flour. Whisk to combine, then set aside for 15 minutes until puffy and foamy on top.
- Add olive oil, 2 1/2 cups flour, and salt, and stir together with a wooden spoon until shaggy.
- Knead – Turn out onto a clean, smooth surface and knead vigorously for 5 minutes. The dough should feel sticky to your hands but will get less sticky as you knead and should not be sticking to the counter. If the dough is too sticky to knead, sprinkle with a little more flour and continue kneading. Dough should be soft and tacky to the touch.
- Proof dough – Wash and dry the mixing bowl and grease the inside of the bowl with 1 tsp olive oil inside the bowl. Add the dough and turn to coat in oil. Cover the bowl tightly with plastic wrap and place in a warm (100˚F) place for 45 minutes, or at room temperature for about 90 minutes until doubled in volume.
- If baking in the oven: Once dough has doubled, preheat oven to 500˚F with a baking stone or baking sheet on the bottom rack position. You need to let the stone heat up for at least 20 minutes, or the pita won’t puff properly
How to Form Pita Bread:
- Divide dough -Punch dough down and transfer dough to a clean surface, and divide into 8 even pieces. Cup your hand around each dough ball and roll until you no longer see a dimple or seam underneath. Cover balls with a damp kitchen towel and rest for 15 minutes for the gluten to relax and make it easier to roll them out.
- Roll dough – Place a dough ball onto a surface generously dusted and press gently into a disk with your fingertips to disperse bubbles. Roll dough balls to 7” wide and less than 1/4” thick. Move the disk several times while rolling to ensure it doesn’t stick to the counter. Keep rolled disks covered with a damp towel so they don’t dry out. Do not stack pitas. Let the disks rest 10 minutes before baking, and they will puff better.
To Bake Pita Bread:
- Bake – Place 2-3 pieces of dough on the preheated pizza stone and bake at 500˚F for 2 to 2 1/2 minutes or until puffed. Remove from oven and transfer to a rack for 5 minutes, then cover with a dry towel to keep the pitas from drying out.
Stovetop Instructions:
- Preheat cast iron skillet over medium/high heat and brush lightly with olive oil. Lay pita on the hot skillet for 30 seconds. Once you see bubbling, flip the pitta and cook for 1 minute – it will puff, then flip and cook another minute.
Notes
Nutrition Per Serving
Filed Under
More Homemade Bread Recipes
These easy bread recipes will make you feel like a pro. Enjoying a warm slice of homemade bread makes the process completely worthwhile.
- Foccacia Bread
- Soft Dinner Rolls
- Classic French Bread
- Banana Bread (or Pumpkin Bread)
- Irish Soda Bread
- Brioche Bread
- Sourdough Bread
- Homemade Hamburger Buns


Took the 2.5 hours and threw these together tonight. I went with the oven method as it seemed a little more fool proof. They turned out beautifully. I can always count on your recipes!
Thank you for trusting us, Wendy. We’re so glad that you loved it!
Thank you for the recipe, I am going to try them this coming weekend. It was recommended by my cardiologist that I follow the Mediterranean diet for my heart health as I am unable to take many medications. And with a double MTHFR mutation, I am unable to consume folic acid, which pretty much enriches every brand of pita bread I have been able to find. I will just make my own like I do everything else. THANKS!
Made your Pita Bread. Delicious Thank you for the awesome recipe xoxo
You’re welcome, Linda. Great to hear that you enjoyed it!
Made this to accompany a Greek salad and they were a big hit with the ladies at our bible study! Recipe was easy to follow and came out beautifully! I used my cast iron pan and they puffed up and darkened perfectly! Thanks for another fabulous recipe:)
I’m glad to hear that it was a huge hit, Debi! Thanks so much for sharing.
I try your recipe ans method. It is wonderful. thank you for your share. Although Thailand is my home country, I like Pita bread.
Thank you for trying my recipe. I’m glad you enjoyed it.
Every recipe here is flawless! This one is not an exception. I think the temperature of the oven is the most critical partin perfecting this.
Thank you for sharing, Anna! I’m so glad you loved this recipe as well.
This was first try at making pita and it is perfect! My fiancé has Syrian heritage, and I am always recreating the family recipes. I made shawarmas and figured, I must make pita! I tried both stovetop and oven. The ones in oven puffed completely, while the skillet bubbled. Maybe not hot enough. So I put the cast iron skillet into the oven too! I love the browning the skillet gives.
Flavor and texture were perfect!
That’s amazing, Maria! I’m so glad you enjoyed the recipe. Thank you for sharing.
Outstanding! This is my new go to” pita recipe. Used the stove top method. Fast, easy and it turned out great!
So glad you found a new favorite, go-to recipe, Anne! Thank you for sharing.
Thank you for sharing this recipe. I saw another person who has a recipe for spinach artichoke pitas that I wanted to surprise my husband with but I needed a pita recipe. You have become my #1 go to for new recipes and I am so glad you have a pita recipe. These look so easy to make that i. Sure even I can do it.
Is it horrible I already want summer to be over so your cookbook will be out? I have it preordered and am impatiently waiting for it’s release.
Hi Leanne! You’re very welcome. I hope your husband loves this recipe!
Thank you for your love and support. I greatly appreciate it.
Love, love, love these! I had never made pitas before and decided to give this recipe a try about a year ago since it seemed so easy. It was easy and even better, the pitas were amazing! I now make them quite often for my family, who also share the mutual love for these pitas. ♥️ Thank you Natasha, for sharing such a delicious recipe.
That’s so great! It sounds like you have a new favorite, Brandi!
Loved this recipe. The oven ones rose better than the cast iron. Made your hummus also. We like it with fresh veggies 😋.
Hi Julie! I’m so glad you loved this recipe. Thank you for the feedback.
Turned out great with one modification. Used the stovetop method and let them cook on one side 30 seconds, per the recipe, before flipping. They wouldn’t puff. This step is just about searing the side to allow the air to trap, so I reduced this to about ten seconds and they reliably puffed after that. I think the 30 second cook time was cooking the inside of the pita too much to allow that nice bubble to form.
Thank you so much for sharing that with me, Josh! I’m glad it worked out well and they puffed up for you!
My first try at pita bread was one with the most 5 star reviews that came up on Google. No comment on that one. Today, I tried Natasha’s recipe. I had to sub AP flour instead of WW, as I had none. This recipe is absolutely superb. I did it in the oven, bottom rack on my stone. Every last one puffed up beautifully, and they taste great. I don’t think I’ll ever go back to store bought, this is so simple to make. Thanks Natasha!
That’s great, Kerry! I’m so glad to hear that. Thanks for sharing.
Only some of mine puffed and the ones that did only puffed partly. That being said, they are so soft and delicious!
Hi Jess, I would recommend reviewing the section titled “Why did my pita bread not puff up?” for troubleshooting, but I’m so glad you enjoyed the pita bread.
Can’t thank you enough for this video and the excellent, easy to follow instructions! I’ve been baking for over 30 years, and pita “puff” has always been a challenge. I really think the resting in between stages is the key. I used a baking sheet in the oven- and it worked! No pizza stone required! Now to master the cast
iron stove top method. Thanks a bunch!
That’s wonderful! You’re very welcome, Beth! So glad it was helpful.
Thank you for giving me a foolproof pita bread recipe .. I’ve tried so many other recipes, but mine never puffed up. With this recipe i got beautifully soft, puffed up, delicious pitas!
Wonderful! I’m happy that you found this recipe.
I love this recipe and even though mine seldom puff “properly” they are always fantastic- pliable and I can still use a knife to make a slit for a pocket. I don’t know if it’s my yeast or my rolling technique but I’m still happy with the results!
I’m so glad you enjoyed it, Bee! Thank you so much for sharing that with me.
Excellent recipe and results!!! So soft and tasty. I did both stove top and oven method – for me, the oven pitas were perfect everytime. The stove was a little hot and miss for me though.
The “duds” are going to wraps later.
I can’t wait to fill them. I’m currently preparing a batch for the freezer – back-to-school prep.
Thanks Natasha!!!
You’re very welcome! Enjoy! 🙂
I want to make this today it sounds good, however I don’t have any whole wheat flour on hand. Would I be able to use regular ap flour?
Hi Jacquie! You could try replacing it.
Hi Natasha, my family doesn’t like whole wheat flour , can I replace with regular flour ?
Hi Lizzie, this recipe uses both, (more all purpose flour than wheat) but you could try replacing.